There are many great tutorials to make subway art. The one I made was time consuming and the lettering isn’t as precise as if the words were stenciled or vinyl.
But it has a humble, handmade look and was relatively inexpensive.

I had several ideas before settling on this method. I considered building the project on Photoshop and having it printed onto a canvas but didn’t want to pay the price for a large one and I was limited to the size.
I also thought about painting the lettering onto a canvas but decided to purchase a pine board that we cut to a 13-inch x 35-inch rectangle.

I printed out the words as a Word document in two different fonts.
Using a paper cutter, I cut around each word and, after sanding, priming and spray painting the board, I positioned them in a pleasing way.
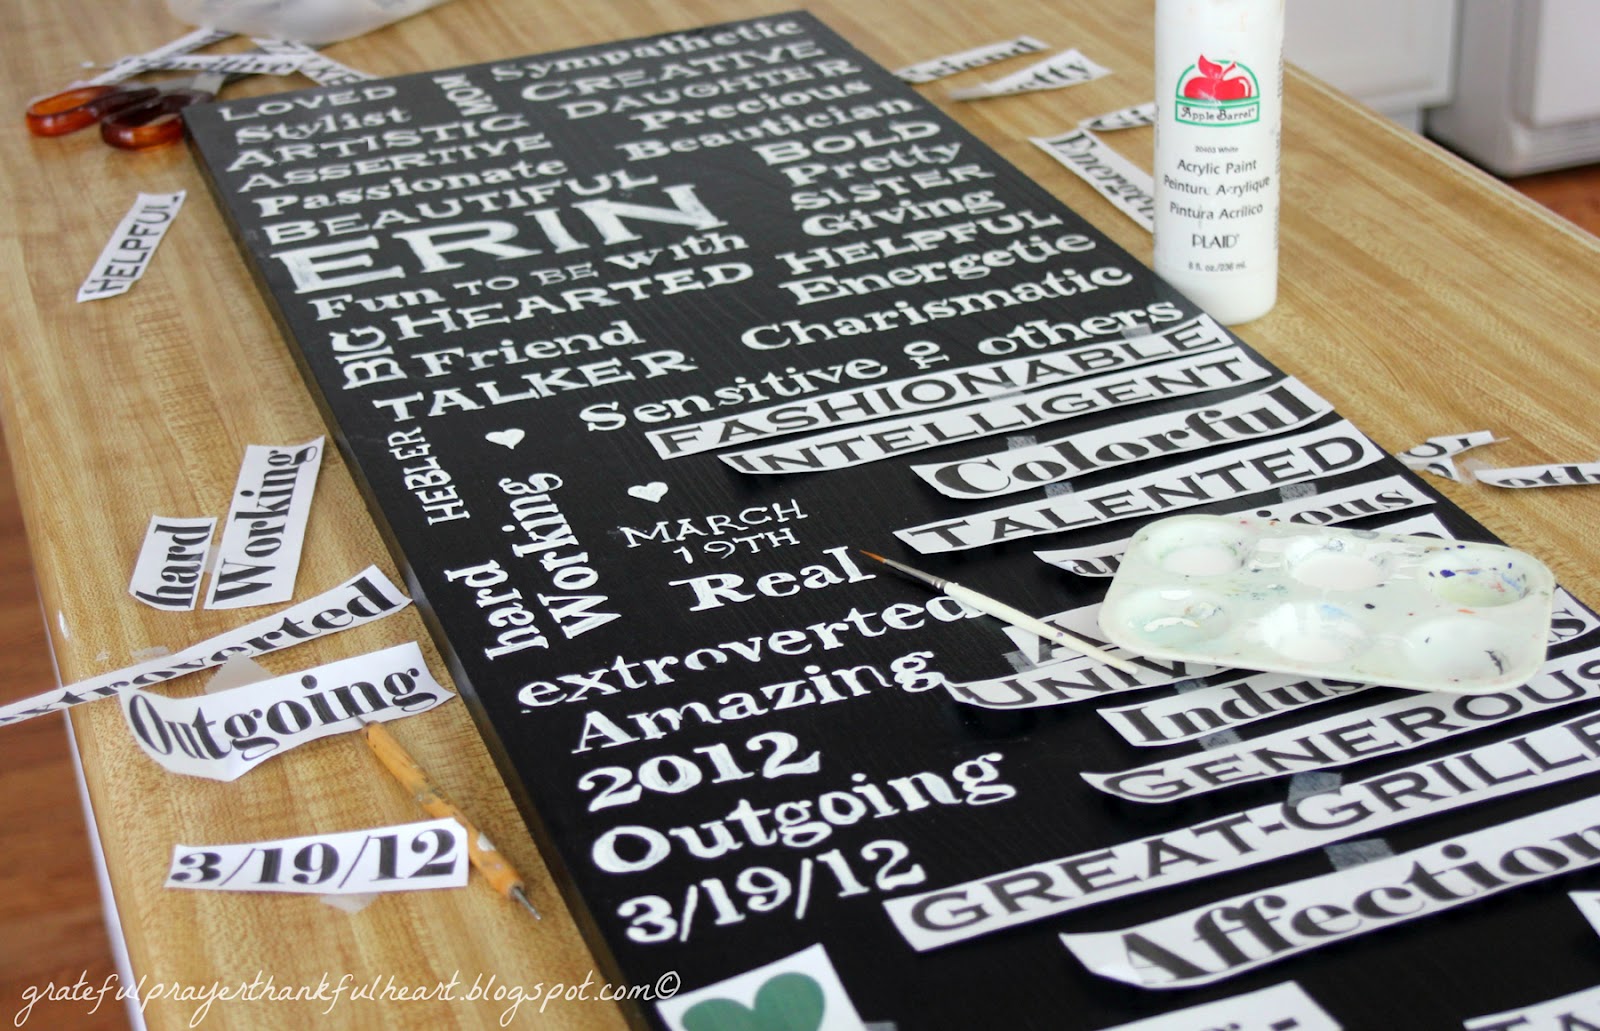
Using a stylist (seen on the lower left in photo above), I traced over the outline of each of the letters.
This was the hardest part of the project as I found it took a lot of pressure to leave an indentation in the board.
Each word was painted with white acrylic paint that I thinned just a little with water, using a thin paintbrush.
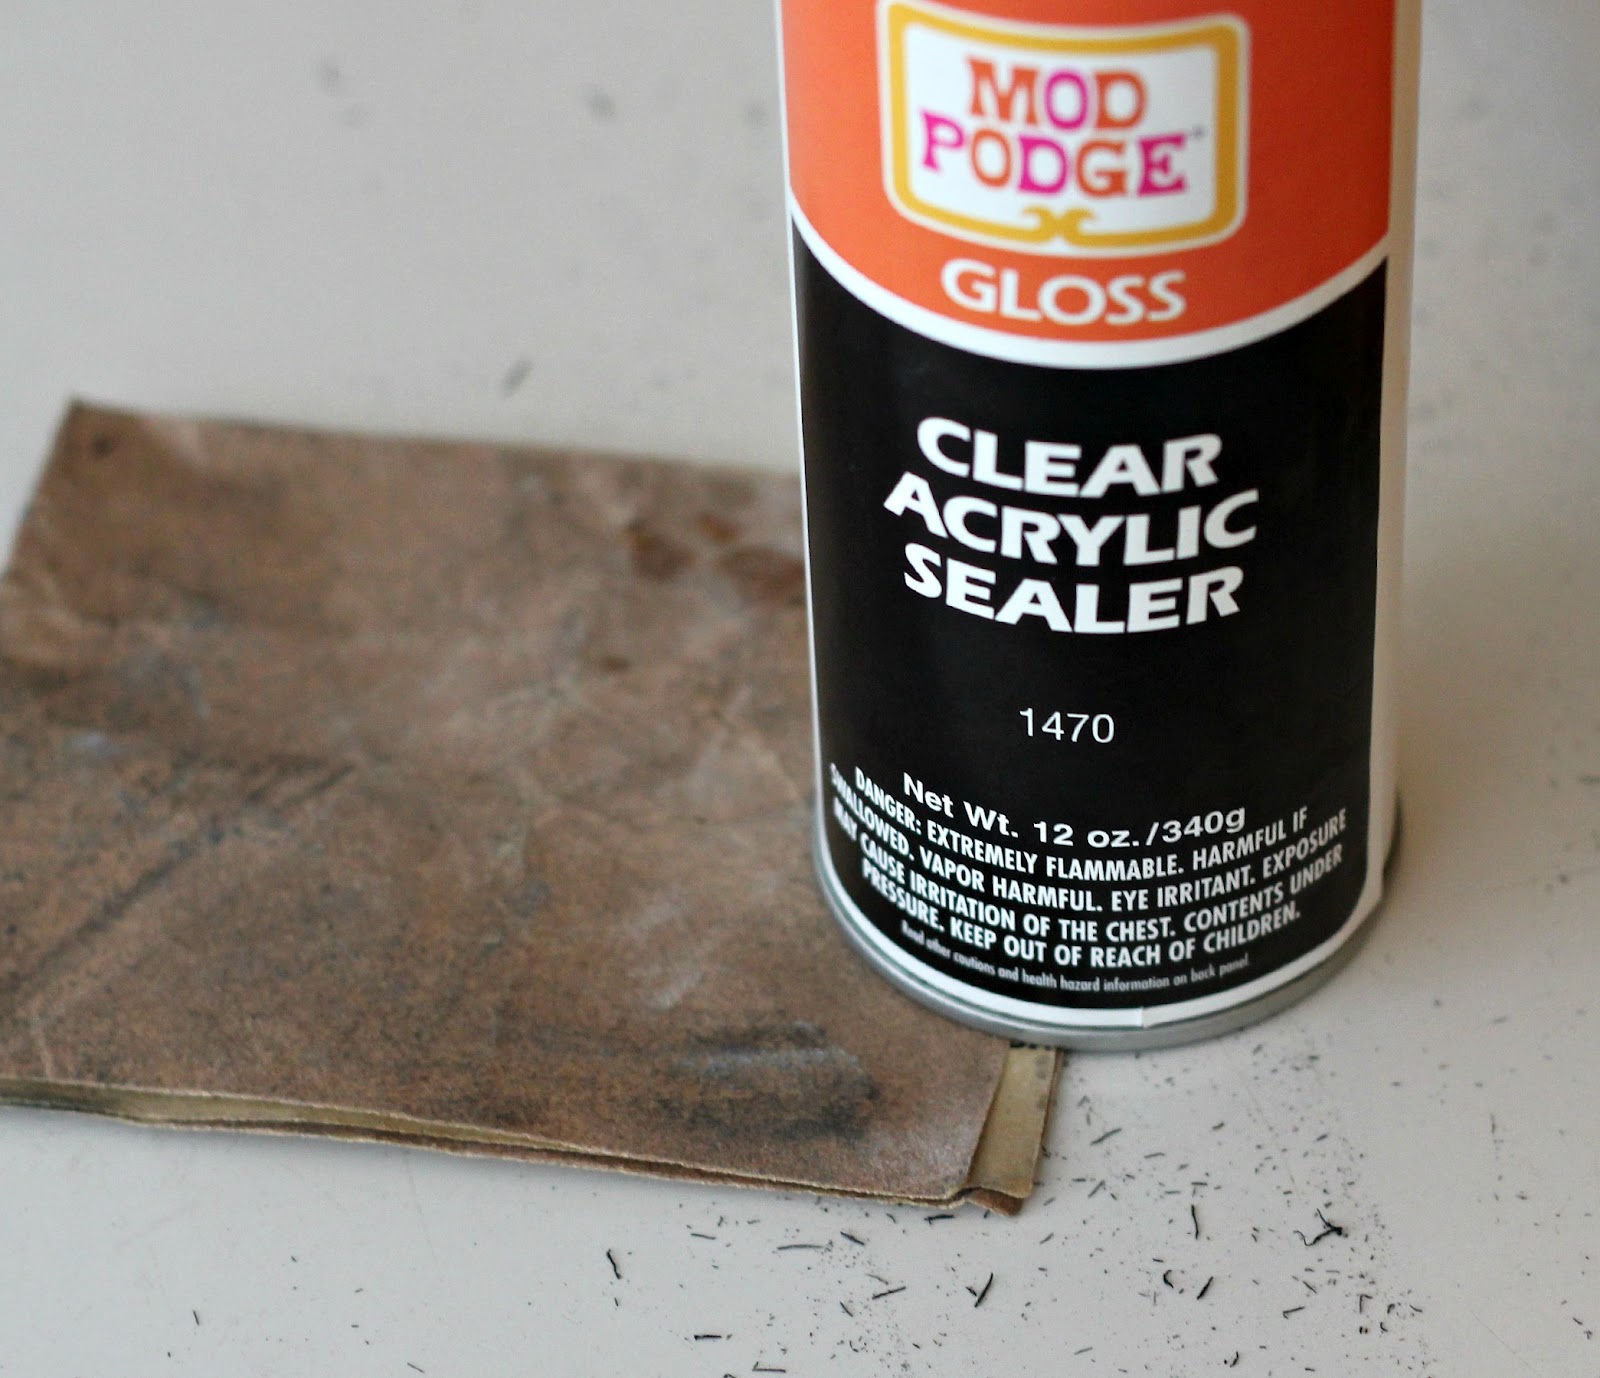
I sanded the edges of the board and some areas on the face as well.

A coat of sealer and a light wash of brown antiquing paint and a final coat of sealer finished the project.
I debated whether to drill of hole on the back, add a sawtooth hanger or add a hook to the top for hanging. I had a brass hook that I had saved from an old lamp. I thought the brass was too bright so I spray painted it black and screwed to the top of the board.

That’s it!
Oh my… bless you, I can't begin to imagine how much time, effort and love went into this.
Personally (me being the very impersonation of lazy), I think I would either buy stencils or stickers. But then I would obviously miss out on that wonderful look with the little imperfections that make the whole piece so unique. Hm… laziness vs uniqueness… decisions, decisions! 🙂
The time and love that you put into this amazing gift is impressive. You sure are one gifted lady!
I love this. It is perfect! I'm sure Erin will love it. Creative and personal. It says "I love you."
You are the most precious Momma…that is AWESOME!!! Just how long did that take you to do?!?!? Somebody else already called it a labor of love and I totally agree. I know Erin was so happy with it and will treasure it FOREVER. God has blessed you with so many sweet talents!!!
Goodness how tedious and time consuming…and gorgeous! Great job. I would love for you to share this an any other of your favorites over at our Friday Block Party at Curb Alert! The link is open all weekend, come see us!
Tami @ Curb Alert!
https://tamicurbalert.blogspot.com/2012/06/friday-block-party-11-feature-from-10.html
Beautiful! I love your gift for your daughter's graduation.
Congratulations to her hard work!
Blessings & Aloha!
What a great project! It will certainly remind Erin how wonderful she is! Patsy from
HeARTworks
You are so creative! This is a wonderful gift to Erin.
Lorraine, for me, the more tedious or time consuming a project, the more worthwhile I consider it, especially if it has meaning behind it. I am going to visit my daughter and help her decorate her new place soon. I would love to make something like this if it will fit in with her new decor. Thanks for your stellar instructions. You had incredible results.
Liz
Truly a work of art. Congrats to your daughter.
This is beautiful, and your daughter will surely cherish it for all the heart you put into it, just for her! ~tina
Love it!! looks fantastic! I would love to do this for my daughter for her birthday in a few weeks this would be a perfect present thanks for sharing ~Love Heather
A beautiful outcome! And a precious gift that is sweetly personal! Love it!
What a great gift idea, one I think I am going to try…maybe if I start now I'll be done by Christmas 🙂
Such a beautiful gift -with your heart in every word. I imagine it will be an heirloom!
What a thoughtful, beautiful, meaningful gift of love!
I can tell that was a LOT of work- but sooo worth it, Lorraine! It is just wonderful and I really like the handpainted look of it- perfect! xo Diana
Wow! I was hoping you'd share how you did this but way too detailed for me. Just not enough hours in a day! It is so fun and I can only imagine how much she loves it. What a great Mom!
Also, love the new look on your blog.
That's a lot of work but well worth the effort and the results were wonderful. It looks fantastic
WOW! That is a labor of love!!! It looks beautiful!
I wasn't quite sure what subway art was, but the way you did it is lovely and Erin must be delighted. Thanks for your sweet wishes and prayers!
Simply, wow! What a lot of detail work. I can't imagine how tired your hand might be after using the stylist around all those letters. The result is amazing, What a gift. And I would think, as you crafted it and worked on each word, it gave you time to think about and pray for your wonderful daughter who has accomplished so much! Beautiful project filled with beautiful words!
This is just awesome…I have wanted a large piece of subway art on my kitchen wall…now you have inspired me to do it…no more excuses
Great, great job..I hope I do as well
I love your subway art! What a beautiful and personal gift that would make. I hadn't realized how much work went into making one of these though.
Blessings and love,
Debbie
Hi Lorraine,
I love what you did for your daughter! I have a tutorial and links to sources I used on my blog. Mine was so cheap to do–staples for $3.99 using engineering prints:-) Just edited a picture over at picmonkey–super easy! Link is on my sidebar. I have been thinking of having mine done on a canvas too:-)
Blessings,
Suzanne
It looks great! What a labor of love.