Grateful Prayer Thankful Heart is a participant in the Amazon Services LLC Associates Program, an affiliate advertising program designed to provide a means for us to earn fees by linking to Amazon.com and affiliated sites. We will only recommend products we use, love or think are informative and helpful.
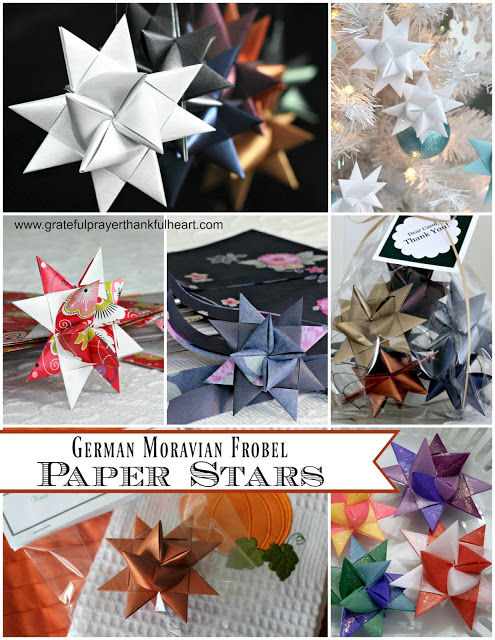

Dipping German Stars in Wax tutorial
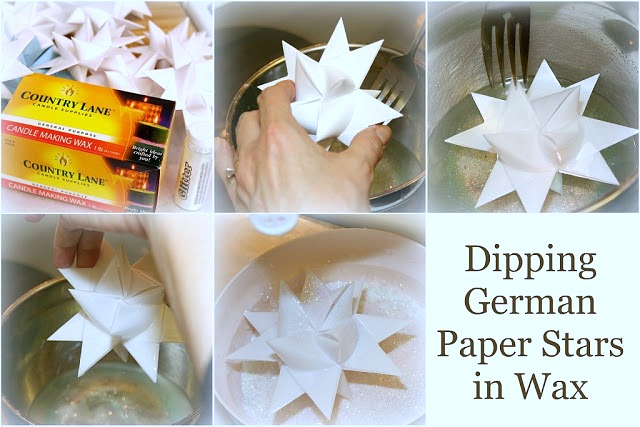
Supplies and equipment
- double boiler or something similar to melt the wax
- utensil to flip the stars and remove from the melted wax
- waxed paper to place wet stars on to cool (alternatively, if you have attached a hanging thread to your stars, they can be hung from a dowel or something similar allowing the wax to cool and harden)
- bowl for glittering
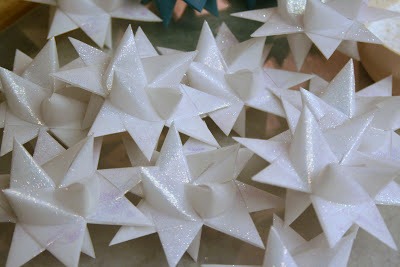
- completed German paper stars
- wax
- fine craft glitter (optional)
- needle and thread for making a hanging loop
Process for dipping German Stars in wax
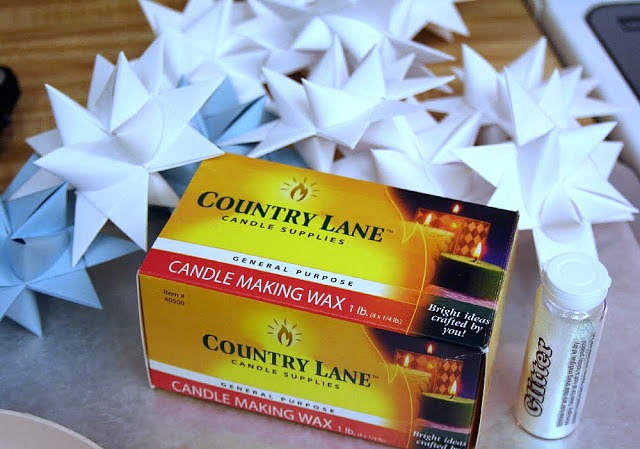
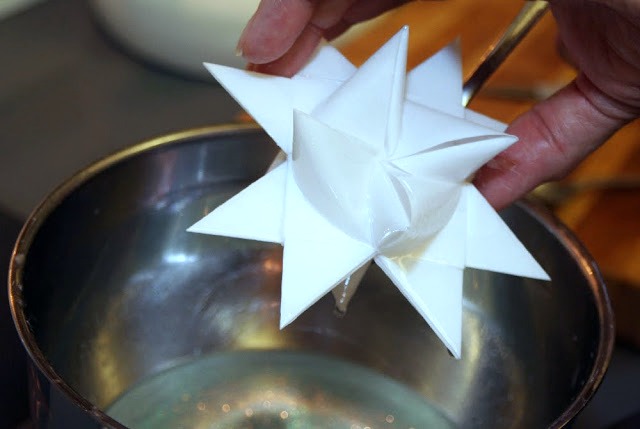
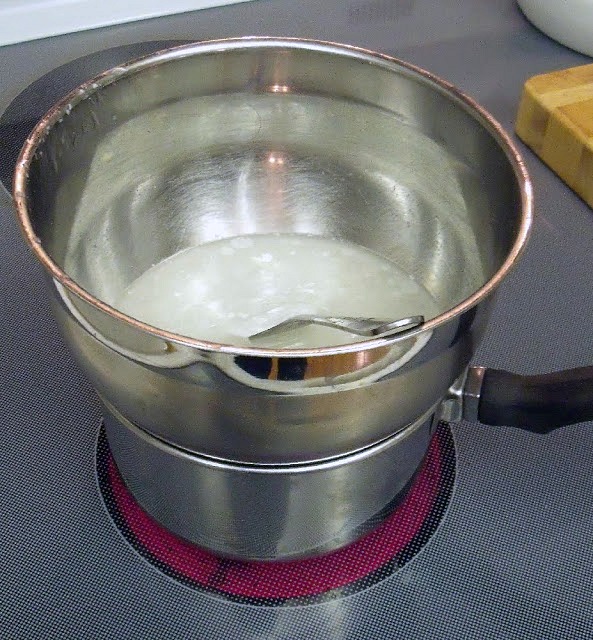 Place a piece of wax in a bowl over a gently simmering pan of water.
Remember to never leave the double boiler unattended. And, once you use a pan for melting wax, it should not be used to prepare food.


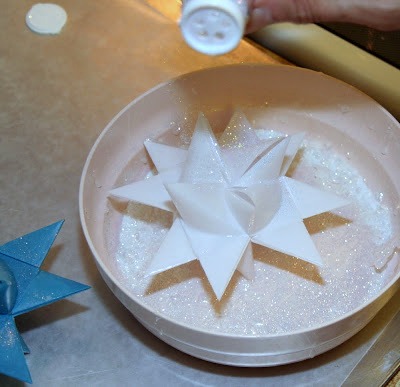
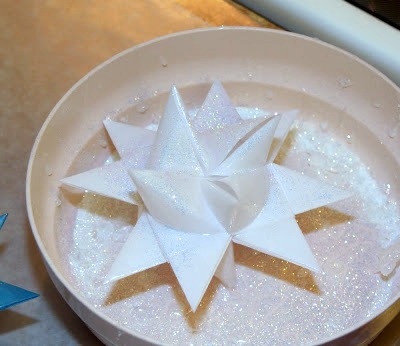
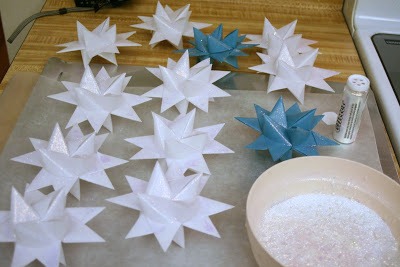
Adding glitter and sparkle


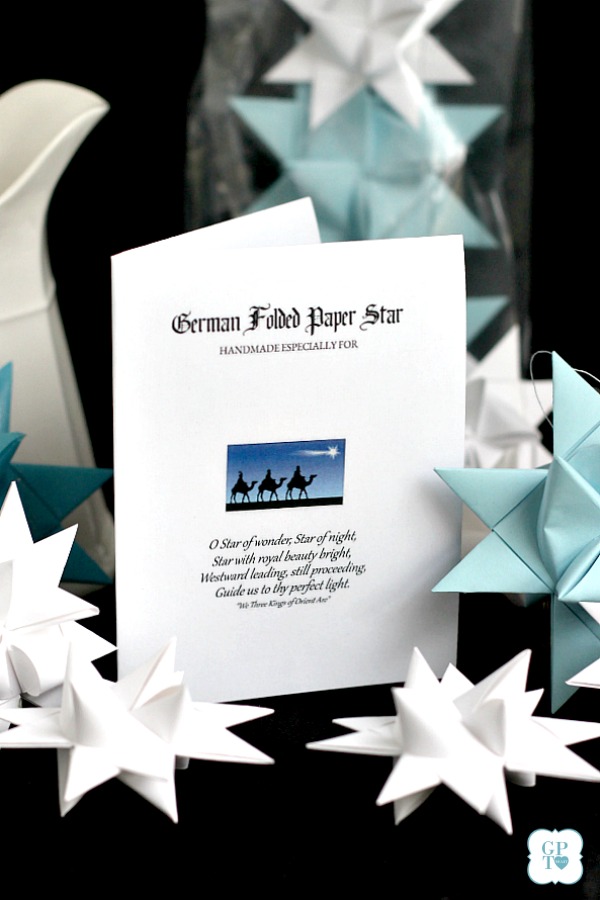 If you are giving stars as gifts, you might want to include a card. I created a FREE printable for you with a place for the recipient’s name on the front, a little history about the stars on the inside and storage suggestions on the back.
Get your link to the FREE printable by clicking German Folded Paper Stars Gift Card.
 Each issue of our Newsletter is timely and helpful and jam-packed with food, crafts, occasional DIY, gardening and faith resources. Relevant and seasonal posts to inspire and guide you with current trends. Available only to those who request it, so please accept our invitation to stay connected and join the Grateful Prayer Thankful Heart community. Just click the subscribe button below.

We had just a few of these stars on our Christmas tree growing up. I finally found out how to make them and like you, dip them in paraffin and sprinkle with fine glitter! I found pre cut strips on Amazon and also at Elegant Quilling, so much faster! Thank you for sharing your craft! I made a few last year at our craft shows where we sell our handmade cards. They sold well.
Hello Rose,
So happy for your visit and taking the time to leave a comment! Yes, the stars are a big part of childhood memories for many. The waxed ones are so durable too.
Kindly, Lorraine
i’m so thankful to have a place to comment here. at age 71 i share this memory, sweet memory, of making these stars as a Blue Bird and then again as a Camp Fire Girl. this would be somewhere around 1958 to 1960, and i swear i can still smell the wax heating and sweeping up all the glitter we spilled on the floors. those stars hung on our Christmas trees annually until i left home. i picked up origami when i began creating greeting cards, but it wasn’t until this year i spied all the dimensional patterns. it’s a wonderfully relaxing craft for me, though shaky hands may have to give it up soon. thanks so much, Lorraine for this blog! enjoy your craft!
Oh, Shirley, how lovely is your comment. I love reading of your sweet memories and your kind words. Thank you much for taking the time to visit and comment!
Sincerely, Lorraine
Hi there,
I am so glad to have stumbled upon your tutorial! My cousin had these on her Christmas tree years back, she forgot how to do it…my question is, if making smaller stars do you need to adjust length of paper??
Could you share where you get your paper for the 1 inch wide stars? It is really difficult to cut 24 inch long paper. Also what is the best type of paper to make them from? I am trying with a light weight cardstock, but it doesn’t work very well. I can’t remember what paper I used when I made these as a young teenager. I had a neighbor who taught us how to make them. I made many of them, but have just begun trying to make them again and I am 80 years old. I would love to make a bunch of them to give as Christmas gifts, but I need paper that is long enough. Thank you!
Thank you so much for your easy tutorial. I have wanting to learn how to make the stars for a few years. I had directions but I am more of a visual learner. I tried a few other tutorials but they were confusing to follow. I was so happy to find yours. It is great!
One of my first memories of Christmas was of these stars hanging on my Grandmother’s tree. For years I longed to learn how they were made. On a vacation to the Smokey Mountains I found a troll shop on the craft loop…I’m not a troll person, why I went in I don’t know, oh, yes I do…hanging from the ceiling where hundreds of the stars. The gentleman that owned the shop had made them from the time he was a young boy. He picked up a great handful of paper strips and ask if I had an extra hour and of course I said yes. We sat under the tree in front of his shop and he taught me to make the stars. When I was ready to leave he handed me a bag of paper strips and told me that ought to get me back to Ohio. Actually, he was born and raised just 50 miles north of where I had lived my entire life. Since that day I have made hundreds and taught many, many people to make them. Thank you for teaching many people to make these. So glad I found your blog.
Hi Sharon, I love reading your story and happy you have shared it here. It is kind of addicting once you have learned to make the stars. I know it is for me 🙂 Everyone seems to love them. Kindly, Lorraine
How wonderful! Here I thought I am the only one who remembers how to make these lovely stars. We spent many evenings every year before Christmas making these stars. Some had to be replaced, others were added each year, others were made to give as gifts to friends and family. My parents taught us how to make them from early childhood. I think I first succeeded at the age of 6.
I also taught my children how to make them, but they have forgotten and I felt sorry that such a wonderful craft would be lost. Thank you for reviving it with a video.
Hi Christa,
Thank you so much for your visit and comment! I am so happy to hear that the post and video were helpful to you. I love reading your story about your childhood. Hope you are now able to make lots and lots of new stars!
Kindly, Lorraine
Lorraine@gratefulprayerthankfulheart.com
I have a few of these stars dipped in wax made when I was a kid in the late 1950’s. They go on our indoor tree every Christmas, and have held up well for nearly 60 years. My sister asked me recently if I remembered how to make to make them. I did not. I was delighted to find your page. We will be making some new one for next Christmas. Thanks
Hi Mike,
So happy to read your comment about the stars and that it will be helpful as you make more for next Christmas. It is amazing that the ones from your childhood have survived and are still enjoyed. They will probably last for future generations and become more and more cherished
Thank you for leaving your comment!
Sending wishes for a Happy New Year!
Kindly, Lorraine
I have tried several tutorials for making these stars and always got frustrated. Well, you ( your tutorial) and I sat down together this morning and I can now say that after three hours (!) I made more than twelve stars. I had to replay your video back each time but at last, I had success..tomorrow you and I will be dipping them in wax and putting glitter on them. Thank you.
Oh, Isabel, you made my day! I am so happy you got the hang of making these stars. Isn’t it rewarding! Thank you so much for your sweet comment!
Kindly, Lorraine
I love these stars, and thank you for the tutorial! As a child, one of my classmates' mothers made these for the class each year. I have them all on my own tree every year. Looking forward to making some of my own!
Thank you so much for your excellent tutorial. I found it while looking for something else on handmade Christmas ornaments. Back in the early 1950's, my dad bought some from a guy at work who was helping a disabled neighbor to supplement her income. They were lost many years ago & I have been searching for instructions for at least 25 years.
Blessings to you.
Thank you sooo much for this incredible instruction video..I am hooked and have been making them for 2 days. Ive been looking for instructions on how to do this. They remind e of my grade school years!! THANK YOU.
This is such a wonderful tutorial. I've just linked to it from my site:
Please let me know if it's okay to link to your projects like this in the future.
Thanks!
Rachel@AllFreeHolidayCrafts
I'm so thrilled to finally find a GOOD step by step video for making these stars!! A coworker of my father-in-law gave them to him in the late '50s. They were still used until '91, when they were lost in a house fire. I've since been looking for a replacement pattern!!
I love these stars! We always had them on our christmas tree during my growning up years. Thanks for the tutorial – I can learn how to make them now!!!
Hello there! I just found your blog via OPT and I love the look of these stars–they are wonderful. Something else has caught my attention, though: Raider!!! He is adorable and I think he might need a new Valentine's Day collar from my Etsy shop, Crazy For Collars! I've added some collars with bow ties and will be adding more in the next few days. Come on over and take a look.
I'm going to look over some of your recipes-maybe I'll be inspired to make something new for my hubby and I (we've been married 33.5 years).
What a cute idea!! thanks !
Diane
I read about this in the book An Early American Christmas. I am thrilled to have the instructions. Thank you!
Warm wishes,
Elizabeth
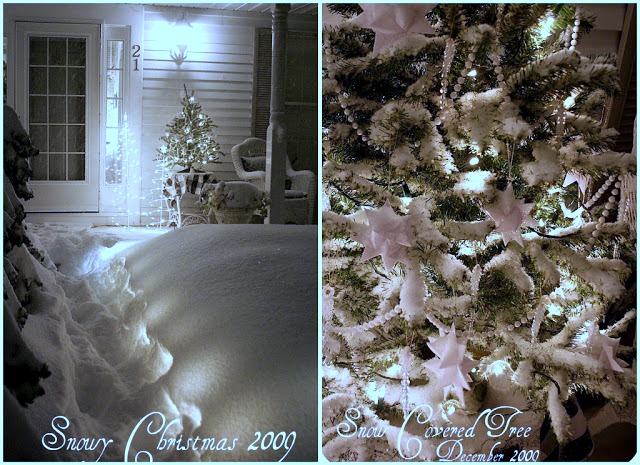
Those are so beautiful! The white stars are stunning on the little snow covered tree.
They are beautiful Lorraine, you are so clever.